
Feel free to contact me:
The website for this workshop is located at:
www.classes.jamiecavanaugh.com/wordpress/introduction/
What other digital education tools do I use?
Check out my profile on edshelf
![]()
Topics
• Getting Started
• What is WordPress?
• How to use WordPress in the classroom
• Other Blogging Software
• WordPress.com versus WordPress.org
• Creating WordPress account at WordPress.com
• Login
• Dashboard
• Settings
• Posts versus Pages
• Categories
• Appearance
• Widgets
• Links
• Comments
• Inserting an image
• Inserting a video
• Resources
Getting Started
To get started with WordPress, I highly recommend using the learn.wordpress.com website to get you up and running. In particular, the Quick Start Guide is very useful.
http://learn.wordpress.com/
http://learn.wordpress.com/quick-start-guide/
What is WordPress?
• Allows anyone to create and update a blog or website.
• Web-based publishing software. Access anywhere, anytime.
• It’s FREE.
.
WordPress is more than blogging.
What is a blog?
A website where an individual enters posts and publishes these posts online.
How to use this in the classroom? Think of it as managing content for a class. A way to complete work in a digital form. Creating class materials online fosters more interaction. It helps students to visualize and to support their thoughts with other media.
How To Use WordPress In The Classroom
Instructor website
Blogs written by instructors are mainly used as an additional communication channel to share information with students. Instructor blogs usually contain course content, course management information, general commentary to all students about their learning progress,etc.
Examples
My Web + Mobile Design classes site: http://www.classes.jamiecavanaugh.com/grdes
Writing + Digital Media class: http://3844f13.quinnwarnick.com/
Student website
Blogs written by students are basically learning blogs or project blogs. A learning blog reports on the learning content as wells as the process (including time taken, sources used, and so forth), an assignment blog is where students can post assignments and projects.
Examples
Jenna Harju: http://jennaharju.wordpress.com/
Lina Cordero: http://licordero.wordpress.com/
A project blog
Often authored by a team of students, documents the project progress and findings.
Other Blogging Software
 |
 |
||
| Moveable Type | Typepad | Blogger | Tumblr |
WordPress.com versus WordPress.org

WP.org vs WP.com from WooThemes on Vimeo.
Creating WordPress Account At WordPress.Com
Free and paid blog hosting service.
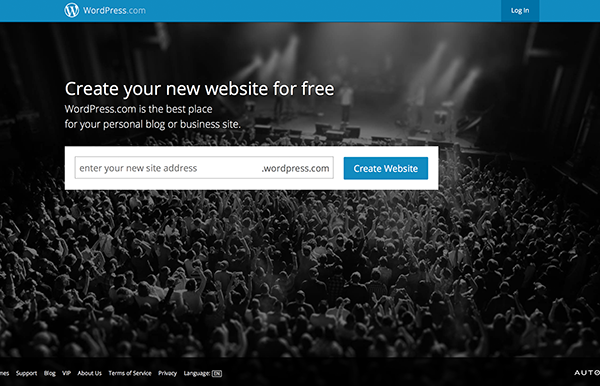
Create an account

Activate your account

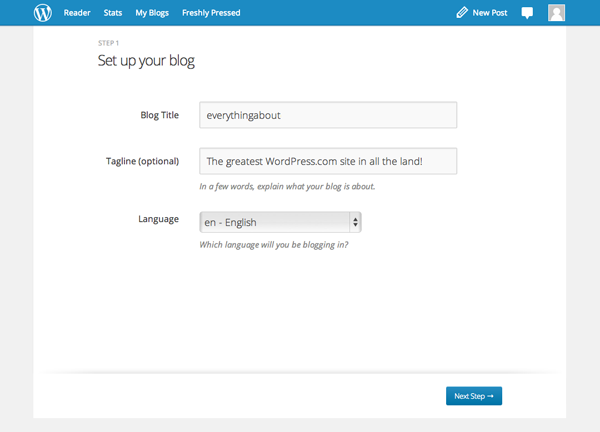
Add Blog Title and Tagline
Choose a Theme

Customize Theme

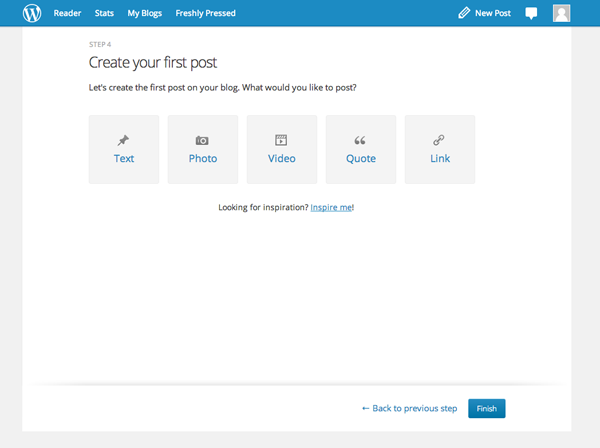
Create your First Post
Go to My Blog Admin

Don’t want to create an account now?
Use this test site: smcwp.wordpress.com
Go to:
smcwp.wordpress.com/wp-admin
username: smcwp
password: everyone4smc
Login
Go to wherever your site is named. For example:
http://yoursitename.wordpress.com/wp-admin/
You’ll see the User and Password login window:

You should have a user name and password from when you first set up your blog. Once we have that’s let’s sign in. Then we see the dashboard interface for WordPress
Dashboard
The dashboard has many options so it might look complicated. We’ll cover the basics here and the basics will give you most of what you need to create your website.

Helpful video: http://wordpress.tv/2009/01/05/the-wordpresscom-dashboard-introduction/
Dashboard Basics
- Posts
- Links
- Pages
- Comments
- Appearance
- Settings
Settings
Exercise 1
Change site title, tag line, and privacy setting.
Settings > General > Site Title
Settings > General > Tag line
Settings > Reading > Site Visibility
Posts versus Pages
Quickpost: Available from the dashboard screen this allows to quickly create new post.

Create New Post
Under the left hand menus of the dashboard we click POSTS and then there will be a button at the top of a new screen that says “Add New” Click it and you will be able to create a new post and modify content.
Creating Pages
Sometimes we want information on our sites not to appear in dated or time stamp entries so for this we create pages. To create pages, in the sidebar menu of your WordPress dashboard click the PAGES Link and it will take you to a menu where at the top there is a button that says “Add New” Click it and you should be taken into a new page, where you can set the title and modify content similarly to a post.
You can create a “draft” version of Posts and Pages and keep these drafts to publish later.
Content Editing Tip #1
Edit WordPress using two browser tabs. One for your admin/dashboard panel, and another to view your site. Make your changes in one tab, and refresh the other tab to check it out. Simple enough, but not always readily apparent.
Content Editing Tip #2
In the visual editor, when you want a line to end, hit SHIFT + RETURN this gives a soft return/line beak, if you want a hard return (return with more space between lines) say at the between two paragraphs just hit RETURN. Just like a typewriter or word processor.
Setting a Static Homepage
The default setting for WordPress is to have the Blog with it’s chronological posts as the first thing we see when we come to a site. Often times though we want there to be a static page and then a link to the blog/posts. Fortunately without to much hassle we can set it up this way.
http://codex.wordpress.org/Creating_a_Static_Front_Page
Categories
Categories allowed for a broad grouping of post topics, but when you wanted to describe a post in more specific terms, more categories were required. Tags are similar to categories, but they are generally used to describe your post in more detail.


For more: http://en.support.wordpress.com/posts/categories-vs-tags/
Exercise 2
1. Quick Edit: Sample pages and Sample posts: change to “Draft.”
2. Settings > Reading > Front page displays: change to “A static page.”
3. Turn off comments using Quick Edit.
4. Add other pages
Appearance
WordPress uses a database to manage/store our content, one of the nice things about it is that we can change the appearance of this information relatively quickly by using a theme, or creating our own. We can browse through the library of themes to choose a new look for our website. To switch themes:
Changing Themes
- Browse for the theme using the search or navigation.
- Notice you can either activate or preview the theme.
- After you activate the theme, view your site and its new appearance.
In general when choosing themes we want to find a theme that has the general structure of how we want the layout for our website
Go to Appearance > Themes > Blaskan (Preview) then Activate.
In Appearance (using Blaskan theme) notice the following:

Widgets
Widget is a fancy word for tools or content that you can add, arrange, and remove from the sidebar(s) of your blog. Widgets make it easy to customize the content of your sidebar(s). You can access your widgets from the Appearance -> Widgets screen in your Dashboard.

Adding Widgets
To add a widget, drag the widget from the Available Widgets or Inactive Widgets area on the left into the Sidebar area on the right. When you see a dashed line appear, you can drop the widget into place.
Configuring Widgets
Each widget has configuration options. To make changes to a widget in the sidebar, click on the triangle on the right side. http://en.support.wordpress.com/widgets/
Exercise 3
1. Notice how the Blaskan theme has options to customize only the header, background, theme options… themes have different options. Therefore choose your theme wisely for a project.
2. In Widgets, add a few widgets to the “Secondary and Footer Widget Areas”
4. Preview your site choosing another theme: Appearance > Themes. Click on another theme and preview.
Links

- Highlight the text you want to link.
- Click the link button on the toolbar.
- In the popup that appears, enter the URL you want to link to. If you want the link to open in a new window/tab when clicked, check the box.
URL – The URL of the link (include http:// at the start for external websites)
Title – Title of the link when a visitor hovers over it (a small tooltip will appear with the title)
Links Menu
We may want to link to our favorite posts and popular web sites. Links make the Internet what it is. Without them it would be very hard to get from one site to another. WordPress.com gives you many different ways to use links on your blog. The Links menu in your dashboard can be used to create a blogroll. A blogroll is essentially just a list of links that appears in your sidebar. The term “blogroll” was originally used because it was a list of links to other blogs, but you can include links to any sites.

Comments
Comments are a way for visitors or students to add feedback to your posts and pages. If you choose to enable comments for your posts, then a comment form will appear at the bottom of the posts and people can respond to what you have written.
Inserting an image
You can insert images relatively easy using the WordPress content editor. The icon for inserting an image is right above the text editor in the post/page editor. It looks like this:
![]()
You can upload the following image types to a post or page on your WordPress.com blog:
- .jpg/.jpeg
- .gif
- .png
Upload Images from Your Computer

Exercise 4
- Go to Posts -> Add New or Pages -> Add New, or open an existing post in editing mode.
- Place your cursor where you would like the image to appear, then click on the Add Media icon above your post/page editor
- Simply drag and drop your files into the box that appears, or click Select Files to choose a photo from your computer to upload
- Click Insert into Post when you’re done adjusting the image’s settings.
Download this image to try it out!
Inserting a video and other media
In addition to images you may also insert the following file types: pdf, doc, ppt, odt, pptx, docx, pps, ppsx, xls, xlsx
Embedding with a URL
To quickly embed a YouTube video, simply copy the video’s URL from your web browser’s address bar while viewing the video:
![]()
Paste it on a line by itself in your post/page editor
To quickly embed a Vimeo video, simply copy the video’s URL from your web browser’s address bar while viewing the video:
![]()
And paste it on a line by itself in your post/page editor:

For help inserting other media using shortcodes
http://en.support.wordpress.com/shortcodes/
Tools > Export
Export Your Content to Another Blog or Platform
It’s your content; you can do whatever you like with it. Go to Tools -> Export in your WordPress.com dashboard to download an XML file of your blog’s content.
Resources
Learn WordPress
http://learn.wordpress.com
WordPress Support
http://en.support.wordpress.com/
http://wpquestions.com/
What is WordPress? (VIDEO)
http://www.youtube.com/watch?v=VdvEdMMtNMY
How to make WordPress Accessible
http://codex.wordpress.org/Accessibility
25 ways to make your WordPress site more accessible
http://wpmu.org/25-ways-to-make-your-wordpress-website-more-accessible/
Footnotes
Many of the above materials are from the following site:
http://en.support.wordpress.com/
Leave a Reply